take care of your gear and it will take care of you…
Your ski and ride gear doesn’t need a ton of maintenance. In fact, you can do no maintenance and still get out on the slopes and have fun. But not as much fun as you could be having if you put a bit of effort into gear upkeep. The most basic maintenance routine is described below. But if you really want to ramp up your experience on slope, read beyond the basics. Take in, assimilate, and use the information you find under the “Wax Is Wonderful” heading below. You won’t be sorry. Not one bit at all.
Gear Upkeep Basics
A little effort on your part over the course of the season can pay huge dividends. First off, your gear stays in better condition so it holds better value should you ever decide to part with it. And if you don’t, maintaining your gear will pay you back with more fun slope side. Here’s a few tips.
At Day’s End:
- Dry your skis or snowboard with a clean, dry cloth to remove excess water, then let them air dry in an open space.
- Take a diamond stone file and lightly run it up and down the base and side edges to buff the metal and add a bit more sharpness.
- Pull the liner out of your boots, remove the footbeds, then let air dry in a warm, open space.
Every Few Weeks:
- Take a diamond stone file and hone the edges using an edge guide. Do this sooner if an edge feels particularly dull.
- Wipe down the ski or snowboard base with a Scotch-Brite or similar scouring pad—always working in one direction from tip to tail—to refresh the surface. Then get a fresh coat of wax on the base. Do this sooner if the base looks whitish or grayish in color, or is simply not feeling as “slick” or is slow on the snow.
At Seasons End:
- Take a diamond stone file and hone the edges using an edge guide.
- Wipe down the base with a Scotch-Brite or similar scouring pad to refresh the surface.
- If DIY, wax the base. DO NOT scrape or brush. Take the wax block and run it down the side edges, covering all exposed metal with a thin layer of wax. Store in a cool, dry, space for the summer. At start of the season, scrape and brush to a high luster. You are ready to start the ski and ride season!
- If not DIY, bring skis or snowboard to Avie’s Ski / Sports and ask for the “Summer Wax” package.
If your preference is not for do-it-yourself, just bring your skis or snowboard in to Avie’s after every 4 to 6 trips to the mountain and we will keep your gear in tip-top shape for you. If you want to keep your edges nice and sharp between trips to the shop, pick up a SWIX diamond stone, or a SWIX edge tuning kit. They are simple to use, and effective. If you want to apply a bit of wax between trips to the shop but do not want to enter into hot iron waxing, see the section below title “In A Pinch Use SWIX F4” and “What About Those New Liquid Spray Waxes?” Using F4 or other liquid wax does not replace a good hot waxing, but in between those hot waxes it will help keep you sliding smoothly.
Want to delve into the wonderful world of ski and snowboard waxing? Read on.
Wax Is Wonderful
Snow and ice can be slippery stuff. We quickly remember that when we try to walk on it. So why is it that when out skiing and riding, the skis or the board all of a sudden feels “sticky” or “sluggish” on the snow?
Friction Is Your Enemy
Slap the base of a ski or snowboard on the snow, stick a bunch of weight on it in the form of a human body, and point it downhill. At the snow-ski/board interface, some strange things happen. All that weight compresses the snow. Forward motion under that weight causes friction as the snow compresses and the friction makes heat. The heat melts the snow under the base of the ski or board. Melted snow is water and water creates great friction which means you go slower. You still go downhill, but you go there slower. You find this out in real-time when you ski through a section of trail where snow-making is taking place. Because man-made snow has a very high water content, you feel like someone hit the brakes as you run over that patch of snow. That’s friction at work. Big time.
Almost always, no matter where or when you go skiing or riding, regardless how frigid the temperature, you will be melting snow under your ski or board base as you slide downhill. Friction makes heat and heat melts snow. The exception will be in powder. Skiing or riding in freshly fallen powder, as skis and boards are floating in that fluffy loveliness, friction is at a minimum. Wax still helps, but friction is less of an issue. But other than powder days, you are melting snow and that melt water slows you down.
Don’t believe it? Next time riding up the lift to the summit, check out skiers and riders sliding down the slopes. Behind them you will see their tracks on the snow. Those tracks will be glistening in the sun. Why? Because the ski base melts the snow as it passes over. Once gone past, that melt water freezes, leaving behind that glistening “contrail” coating of ice.
Wax Beats Friction
The base of a ski or snowboard is porous. See the “Skier Need To Know—Ski Construction” page for more on the composition and manufacture of ski bases. If you want your base to slide better you need to reduce that pesky friction. The way to do this is through wax. And here is where doing your own waxing pays huge dividends.
Tools of the Trade
You need a few basic tools
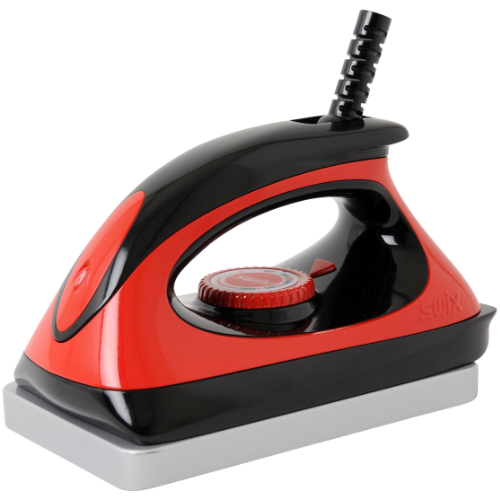
You need a waxing iron. Yes, you could use a clothes iron, but clothes irons run way hotter than you want, scorching the wax and your ski or snowboard base. A SWIX waxing iron will give you a nice, constant heat at a temperature you set based on the wax you are going to apply.
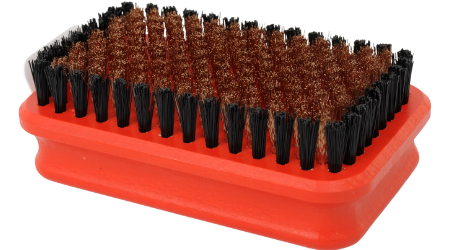
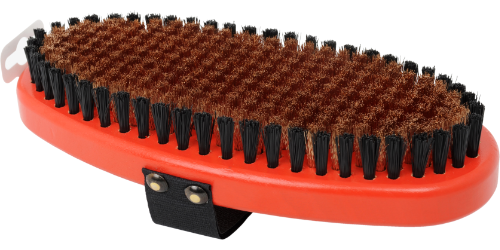
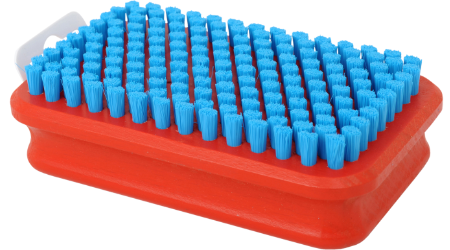
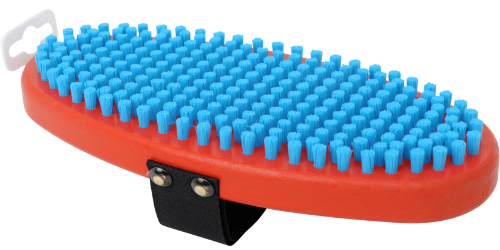
You need a scraper. After you apply the wax and the base cools, you need to shave the excess wax off. Yes, it sounds weird to take off the wax after putting it on; see “Saturate The Base” below for an explanation. Finally, you need a brush, two if you want the ultimate waxing finish on the base. A square brass brush will do everything you need to complete your waxing task. A square blue nylon brush will polish the base to a super slippery finish. The oval versions of both cost a bit more, but are worth it if you plan to wax multiple pairs of skis and/or snowboards.

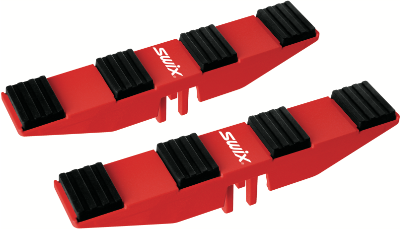
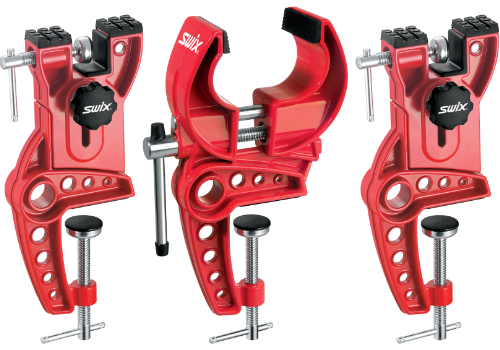
You can set skis and snowboards across a pair of saw horses or similar set up to get your waxing, scraping, and brushing tasks completed. A vise however, will make the job so much more enjoyable, and a heck of a lot easier. The standard vise is all that you will need for waxing and edge tuning should you take up that aspect of gear maintenance. The World Cup vise is a bit beefier and allows more flexibility in holding skis and snowboards on edge for honing, but is a bit on the pricey side. The snowboard adapter makes things much easier for those doing snowboards, but only fits the World Cup vise. For those doing only snowboards, SWIX does make a snowboard specific vise.
Now you know the tools of the trade. Read on for how to use them.
Saturate the Base
The first and best thing to do with a new pair of skis, or a pair you are now going to be upgrading to beat friction, is to saturate the base with wax. The base is porous, containing a matrix of holes and channels. If nothing is ever done to the base, those holes and channels fill with dirt and crud, making the downhill slide slower and slower.
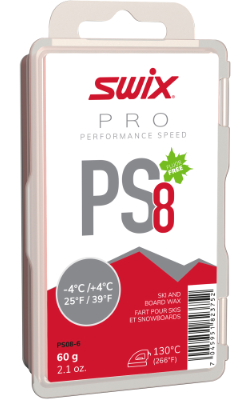
Rather than let the base fill with crud, fill it with wax. For new skis, grab a bar of Base Prep wax or a bar of SWIX “red” [PS8]. Both are very soft waxes that will penetrate far into the base. In a warm area, apply a liberal amount of wax to the base, and spread it all over with a hot waxing iron. Let it cool for about 10 minutes or so, then iron over it again, being sure that wax covers the entire base surface. Do this 3 to 4 times, adding more wax where the base gets dry. If the ski is used, clean the base with a base cleaner to remove dirt and gunk first, then do the above.
At the end of your faux “hot box” routine, scrape the wax off the base. If you are not applying a top coat of temperature specific wax—you can ski on the wax you used to saturate the base—then brush out the base and hit the slopes. This won’t be very different than skiing or riding on the “all purpose wax” applied by most ski shops. You may however, opt to apply a temperature specific wax topcoat. Read on to become convinced.
Once you get the base filled with wax, any wax you apply as a top coat will last much longer. The base will be black and shiny, and will stay that way. Having the base saturated also means you use less wax in the topcoat. If you start using some of the more expensive waxes that better fight friction, then using less is much more economical, as high performance waxes are pricey.
Temperature Specific Topcoat
With the base nicely filled with wax, it’s time to apply the topcoat. Ideally, before applying the topcoat wax you will know the temperature of the snow. There is a deep science behind selection of wax for specific snow conditions. If you are a professional ski racer, this is hugely important because one one-thousandth of a second can mean the difference between winning and losing. For the rest of us mortals, getting pretty close is good enough. All we really want is to reduce the negative impacts of friction under our ski or snowboard. Check out weather conditions for when you plan to ski or ride, and select a topcoat wax based on your “best guess” at temperature expectations.
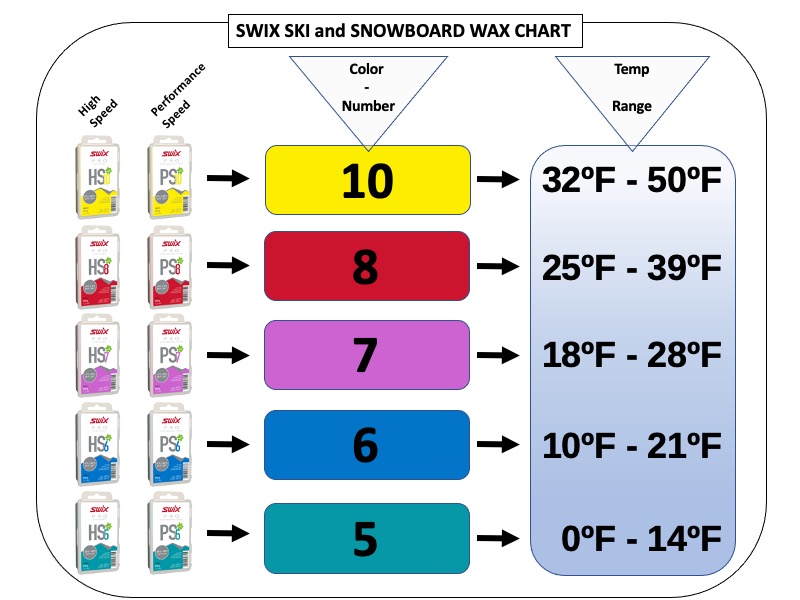
SWIX makes a range of waxes, each having a different color and number designation. The chart above give you a quick reference point for each wax. Each color/number references a certain snow temperature range. Warm temperature waxes are softer and more water resistant while cold temperature waxes are harder and more abrasion resistant. In very cold conditions, snow tends to be dry and abrasive. A hard wax is called for so that the wax will stay on the base longer, fighting friction longer. In very warm conditions, the snow tends to have a very high water content. Warm weather waxes tend to be soft, and will have a higher degree of additives designed to better repel water.
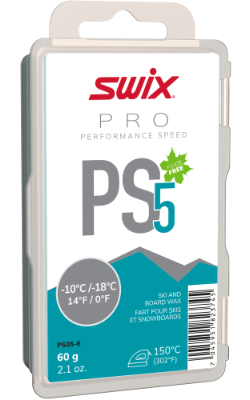
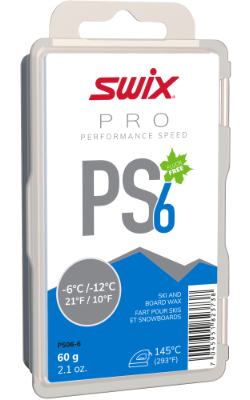
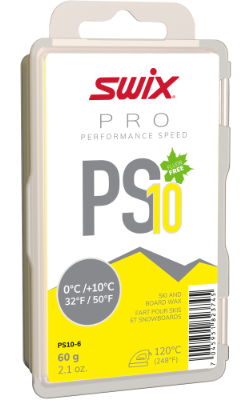
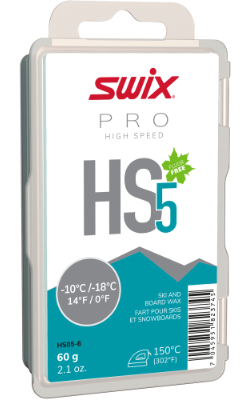
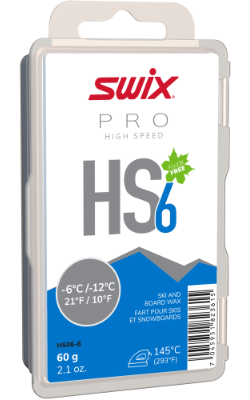
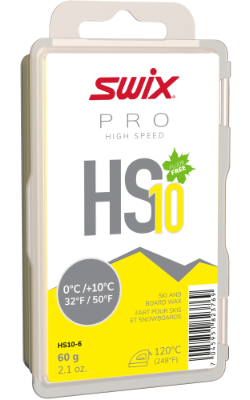
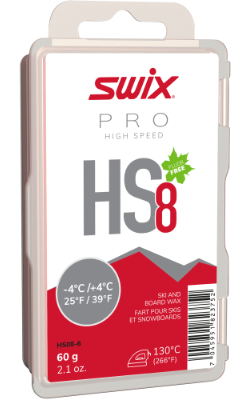
For New Englanders, SWIX “purple,” or PS7 wax, really is the “go to” for most of the season. Anyone waxing their own skis ought to have a bar or two of this wax on hand at all times. SWIX PS7 covers snow temperatures from 18 to 28 degrees Fahrenheit. Every ski waxer should also have a bar of SWIX “red,” or PS8 which covers a range of 25 to 40 degrees Fahrenheit. There is a SWIX “yellow” (PS10) which would be useful in the spring when temperatures range 50 degrees and higher on the slopes. Every ski waxer should also have a bar of SWIX “blue,” or PS6, for those times when temps tumble down into the teens. There is also a SWIX PS5 (aqua blue-green; 0 to 14 degrees F) for those that really want to round out their wax selection. The PS5 wax can have a special role to play, as described below in the “Base Burn” section.
Waxing Alchemy
Application of the topcoat wax is simple. Apply the least amount of wax you can to cover the entire surface of the base once melted by the waxing iron. The most efficient way to do this is tap the bar of wax to the bottom of the hot waxing iron, then “crayon” it onto the base. Do this until the entire base is covered. This method uses less wax and so is more economical. Using less wax also means less to scrape back off, reducing time spent at the bench scraping and brushing.
Pick whatever wax color is most appropriate for the anticipated conditions and apply it. What if expected conditions will be on the borderline of one color, for instance on the warm side of PS7? Crayon in a meager amount of PS7 followed by a crayon smear of PS8. On the colder side? Crayon in some PS6. Mix and match to your hearts content. Blend up a mixture you think will be a winner. Regardless, it won’t and can’t be “wrong.” The only “wrong wax” is “no wax.”
Base Burn
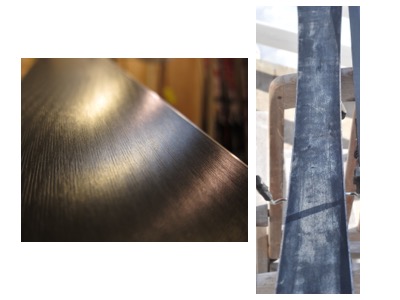
Are you one of those skiers or riders that, at end of the day, have really light or white colored areas on the base? Generally in the center along the sides? That’s called “base burn.” It occurs when you spend a lot of time on edge in crusty, icy, abrasive snow conditions. If you do a lot of carving, you likely see a lot of base burn. No, it can’t be avoided. Unless you stop carving. In other words, it can’t be avoided.
While it can’t be avoided, it can be helped. This is where a bar of super hard wax, PS5 for instance, will be handy if you are a “base burner.” Before you apply the topcoat of wax, drip a little bit of the super hard wax on the areas that usually get base burned. Iron it in and let it completely harden. Give a quick scrape to get the bulk of the excess wax off, but don’t brush. Apply the topcoat as usual. The extra hard wax in the area that takes the most abuse from abrasive snow will wear away more slowly, fighting that abrasion better. You should see a reduction of base burn in those areas where you applied the harder wax.
A New Waxing Paradigm
In days past SWIX used a CH designation for it’s all around hydrocarbon based waxes, and LF for for their low-fluorocarbon based waxes, which were more “hydrophobic,” meaning they repel water better. There was also a HF wax with a higher fluorocarbon content. Each jump up from CH to LF to HF meant greater speed as friction was more effectively reduced.
The down side of those wonderful fluorocarbon waxes was that the fluorocarbons were pretty environmentally nasty things. They didn’t break down readily, and when found in high concentrations, could have negative effects upon water quality and wildlife.
So these waxes were banned in Europe with the U.S. following suite shortly thereafter. Fortunately, the mad chemists rushed into their labs and concocted some new wax formulations that do not use fluorocarbons, are environmentally benign, and still provide that extra assist in beating friction between snow and ski base.

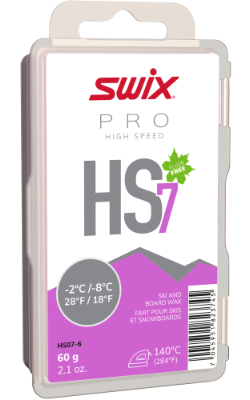
SWIX waxes now bear the designations of PS (performance speed), HS (high speed) and TS (top speed). PS has replaced CH as the entry level, most economical ski wax. HS has replaced LF waxes while TS has replaced the HF waxes. HS waxes will be for those that want a bit more speed out of their downhill glide and are willing to pay more for that speed.
In general terms, PS waxes are in the $15 range for a 60 gram (a bit more than 2 ounces) bar while HS waxes will be in the $25-$30 range for the same sized bar of wax. The TS waxes become ridiculously expensive. Unless you are a serious ski racer, PS and HS waxes will serve your needs.
Is it worth the extra money for HS waxes? That can only be answered by you. If having some extra glide is intriguing, then get a bar of HS7 wax and try it out. Decide from there. In general terms, you will slide along faster, and further. One great benefit of waxes that beat friction better is when you get to those relatively flat “runouts” at the bottom of some trails, or that connect trails, or that are inherent on some novice trails. You will travel along further, with less effort expended in skating or poling along as a skier. As a snowboarder, it may be the difference between having to unbuckle and walk, or keep on sliding.
Try out the new HS waxes and form your own opinion. At least now, should you decide you want that extra glide and speed, you can do so with a clean environmental conscious.
In a pinch, use SWIX F4


Get in a situation where you don’t have the time to do a full waxing job with the waxing iron? Not a problem. If you have been maintaining the base all along and it is full of wax. And if you have a container of SWIX F4 liquid wax in your ski or boot bag. Apply the F4 as directed, wait 5 or so minutes then buff the base with a cork brush (supplied with the F4). Go skiing and riding. While F4 does not take the place of a good iron-into-the-base waxing job, it will help you beat friction during those times when that just isn’t possible.
What about those new liquid spray waxes?
Want to continue keeping your skis or snowboard base in good sliding condition without having to hot wax with an iron every time? Try out the new SWIX PS or HS spray on liquid wax. Like using F4 they do not take the place of a good hot iron waxing. But they will get you through several times on the slopes between those hot iron on wax jobs. And they are simple.
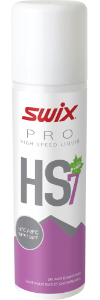
At end of the ski day wipe down the base of the ski or snowboard so it is completely dry. Spray on the wax as directed and let sit for 15 to 20 minutes. Polish the base with a SWIX nylon blue brush, working from tip to tail, until the base is slick and shiny. Wipe off the dust with a lint free cloth if you have one and want to do the ultimate job. Go have fun beating friction.
SWIX liquid spray on waxes come in both PS and HS levels, and in the full range of temperature specific formulations. Now you have no excuse not to keep those skis or snowboards slicked up and ready to go. After every half-dozen or so preparations with the liquid wax, clean the base and do a good iron in hot wax to keep things in tip-top condition.
Edge Tuning
Keeping edges sharp is important, especially here in New England where a crusty, crunchy surface is “the usual.” Keeping your edges sharp is easy, and fast. You will need a diamond stone, two if you want to cover most all situations, or a SWIX edge tuning kit. The SWIX tuning kit gives you both stones, a ski break retainer, and an adjustable angle jig to hold the stones. The big advantage to the kit is that you will ensure you always keep the side edge angle consistent.
Edge Maintenance

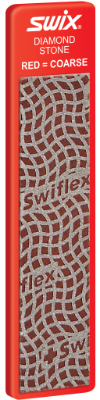
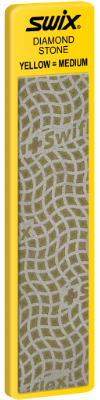
At the end of each day take your diamond stone and make a few light passes over the base edge and then over the side edge. Don’t worry about messing up angles. Let the stone lay gently against the edge and with a light touch run it up and down the base or bevel. The light touch and fine grit of the diamond stone will not alter edge or base angle to any significant degree. Check sharpness by gently running the top of your thumbnail across the edge with the base facing away from you. If you feel some resistance as you pull your nail across the edge, it is plenty sharp.
If you are using the SWIX tuning kit, put in the proper stone set to the proper angle and do a few laps up and down the side edges. It will only take a few gentle passes.
If you do real damage to an edge—hitting a rock or other hard object that puts an actual dent or bends or curls part of the edge—will you need to move to more aggressive edge repair. If you don’t have the right equipment for a major repair to the edge, bring the skis or board into Avie’s and we can fix that up without any problem. If you have the SWIX tuning kit, you can pop in the serrated-tooth file and work over the damaged area or use a diamond stone to remove burrs and get back to an edge condition that can then be honed and polished with diamond stones.
If you really want to get into edge tuning with a high degree of finesse, SWIX makes a line of angle jigs and files for both side and base bevels that Avie’s can special order for you. They are an investment, but if you want the ultimate in edge angle and sharpness control—maybe you race— this is the way to go. If interested, send an email to the address at bottom of this page and Avie’s Ski / Sports can help you get what you need, and learn how to successfully put those tools to work for you.
Check out the links below to get started in making your gear last longer, perform better.
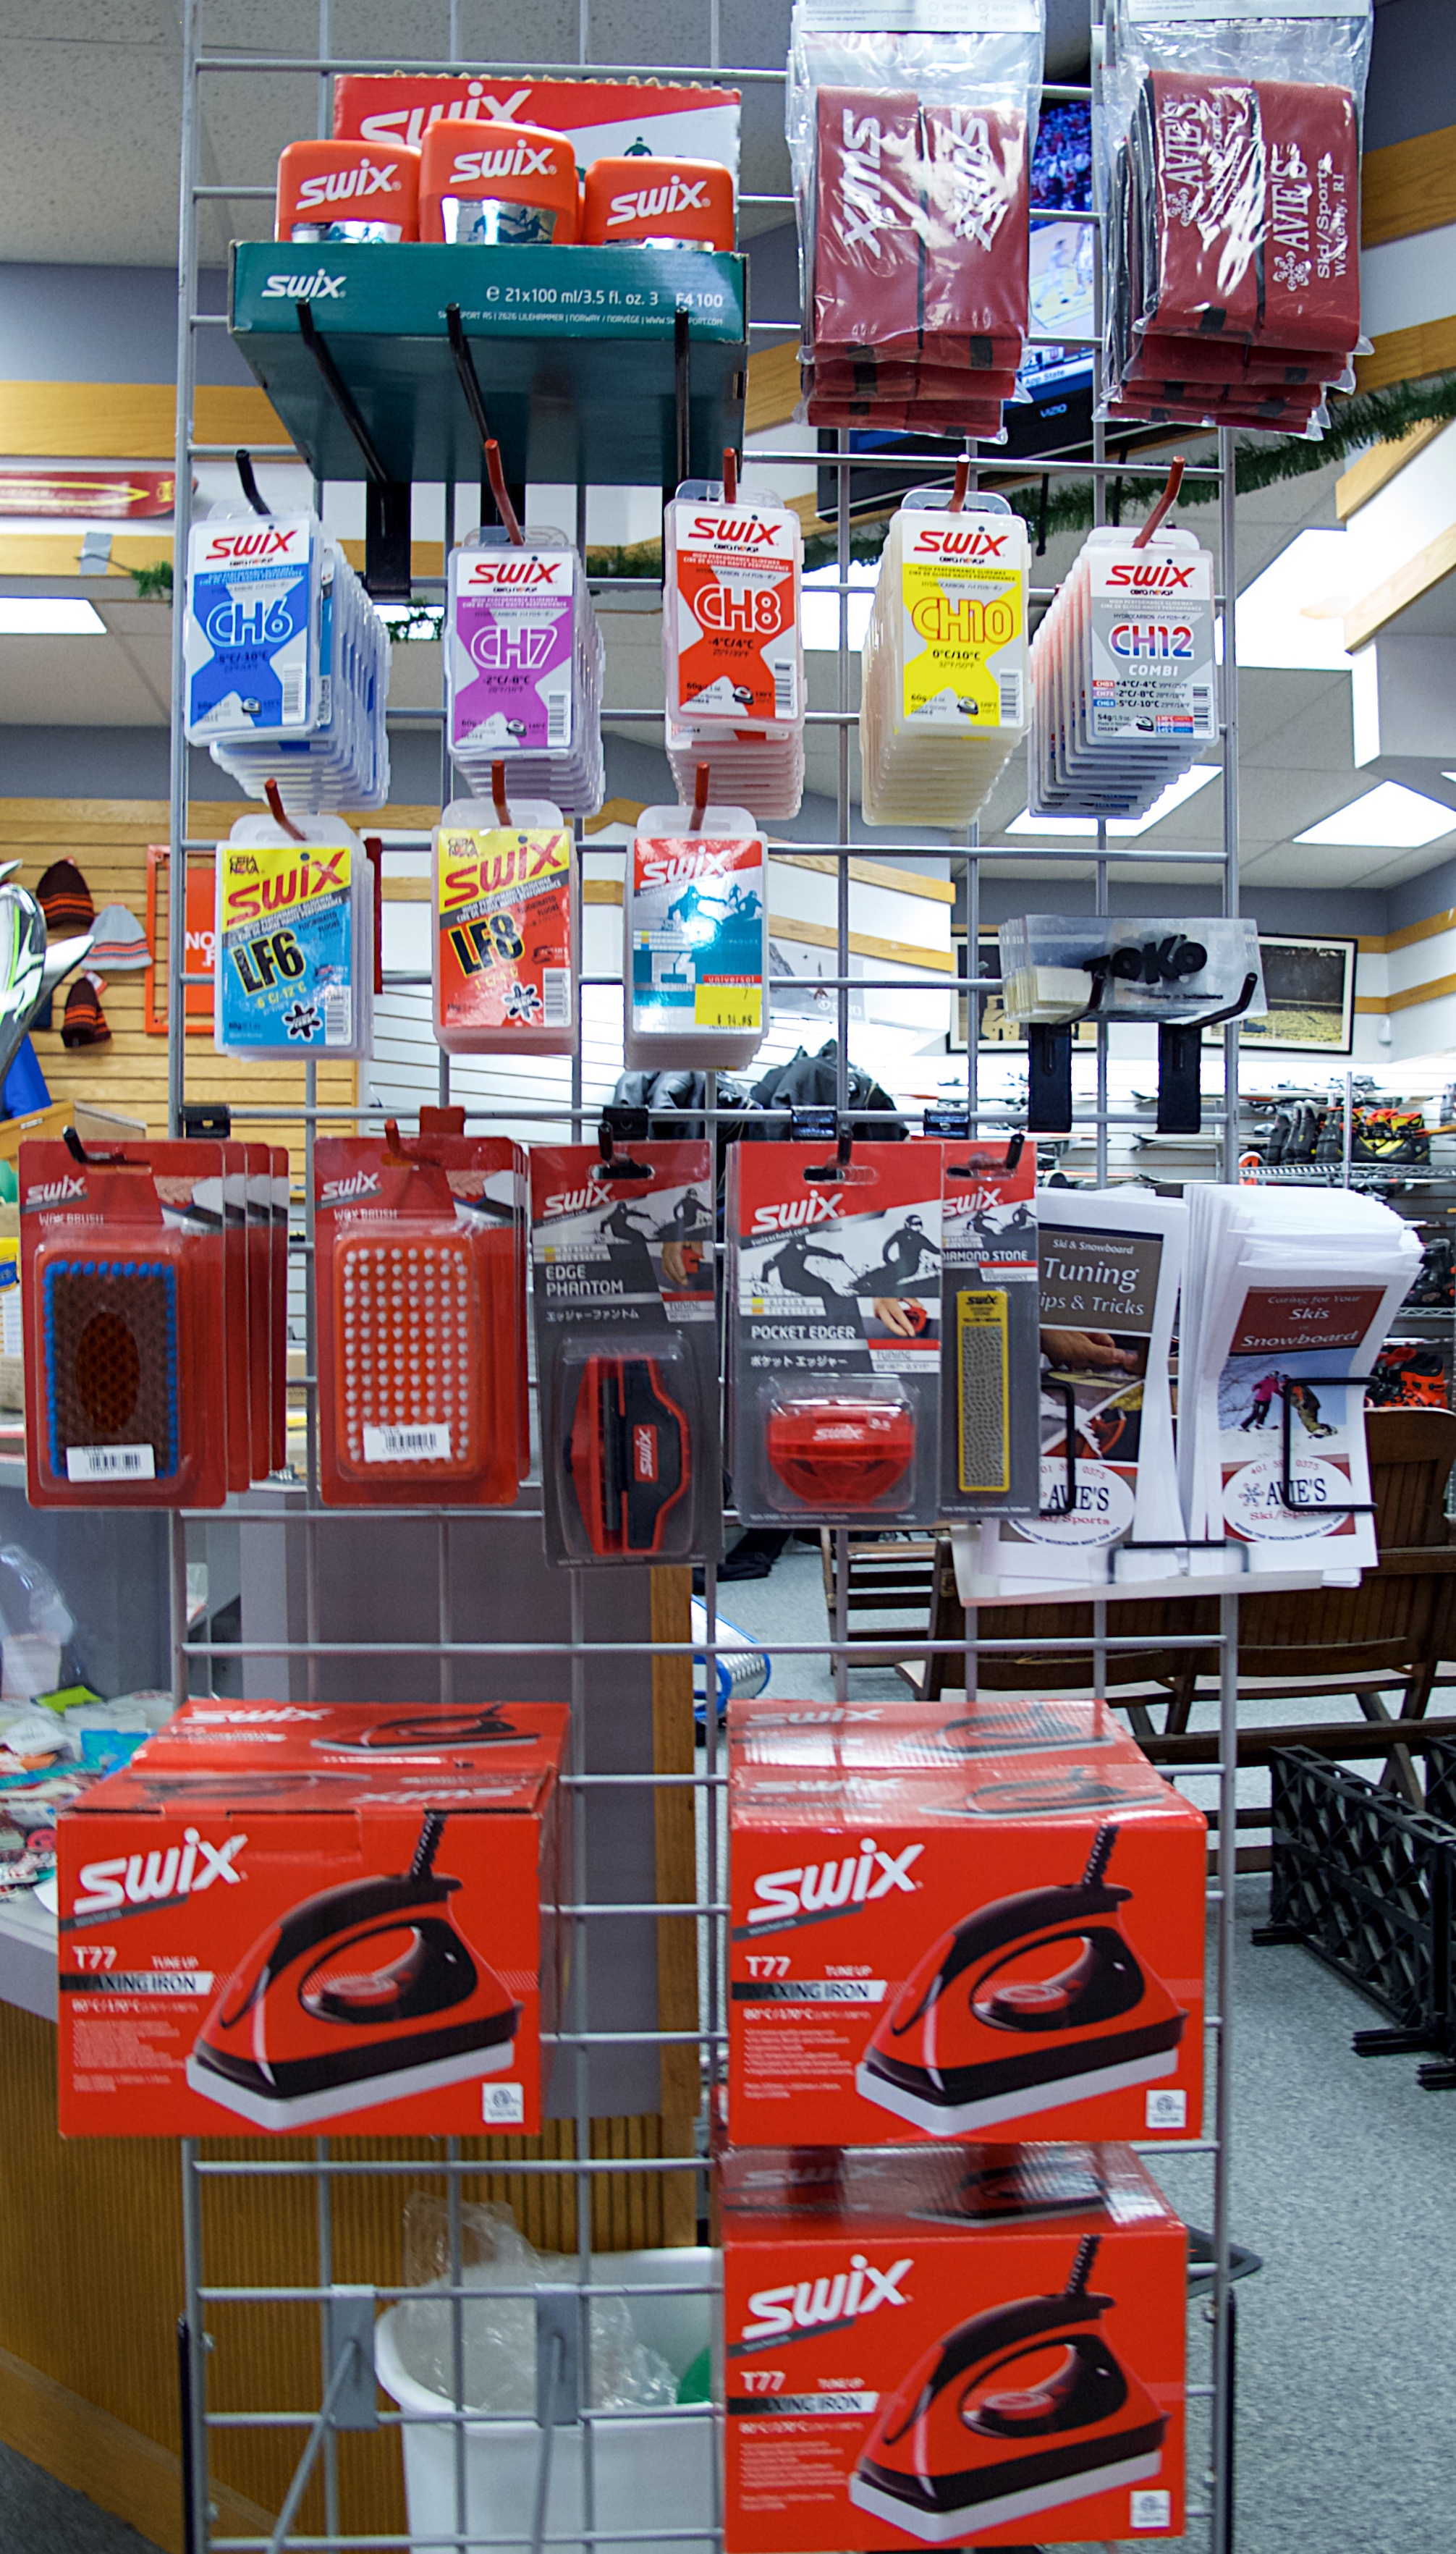
Want more? Then check out this SWIX link where you will find descriptions of all things SWIX, including some instructional videos. Also check out this Youtube clip for a nice, easy “how to” on waxing, or visit this Toko site for more tuning and waxing videos. For a quick overview of waxing tools and supplies available at Avie’s Ski / Sports, see the “SWIX Tuning Center” page. Remember, we can special order anything you might need from SWIX.
Have a tuning or maintenance question? Need help figuring out a dilemma? Want a small group or even one-on-one tuning clinic? Want advice on something technical? Need a special tool? Send your query to: tuningshop@aviesskisport.com
[updated October 2022]